Local Minihack Lab with Vagrant
These are instructions for running a script that will automatically setup a local environment with several Virtualbox VMs which closely match the NCAE Minihack environment.
This enables the following:
- Practice without cloud access / internet.
- You can test your external internet config within the system as you might on game day.
- Makes the user experience smoother.
Installation
Dependencies ⭐
You will need Virtualbox, Vagrant, and the Ruby programming language. I have included links / instructions for setting these up on each platform below.
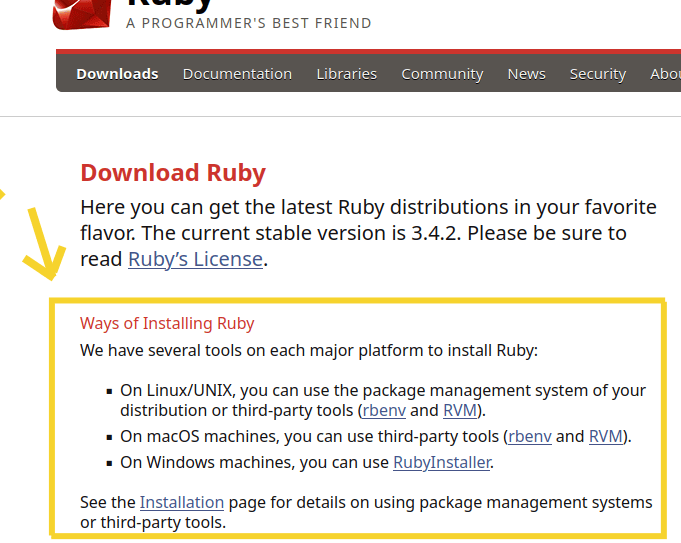
You can follow OS-specific advice below, or check out https://www.ruby-lang.org/en/downloads/ if those instructions aren't working for some reason.

Windows
- Virtualbox → https://www.oracle.com/virtualization/technologies/vm/downloads/virtualbox-downloads.html
- Vagrant → https://developer.hashicorp.com/vagrant/install?product_intent=vagrant
- Ruby →https://rubyinstaller.org/
- Or check out https://www.ruby-lang.org/en/downloads/
Linux
- Virtualbox → Package manager, or https://www.oracle.com/virtualization/technologies/vm/downloads/virtualbox-downloads.html
- Vagrant → https://developer.hashicorp.com/vagrant/install?product_intent=vagrant
- Ruby → Download it from your package manager
- Or check out https://www.ruby-lang.org/en/downloads/
MacOS
- Virtualbox → https://www.oracle.com/virtualization/technologies/vm/downloads/virtualbox-downloads.html
- Vagrant → https://developer.hashicorp.com/vagrant/install?product_intent=vagrant
- Ruby → You must have the Homebrew (
brew) package manager. Install it with this command:brew install rubybrewpackage manager: https://brew.sh/- Or check out https://www.ruby-lang.org/en/downloads/
After installing required dependencies...
Obtain the script by doing 1 of the following:
- Download the zip of the repository and unpack it: https://github.com/reg1z/Local-Minihack OR
- Clone the repo with git: git clone https://github.com/reg1z/Local-Minihack
NOTICE
GUI IS THE ONLY WORKING FLAVOR RIGHT NOW
**There are 2 1 flavors of the script you can use: **
- GUI - Mimics the "Minihack" environment.
- Run
vagrant upfrom the "GUI" directory if you want access to the desktop environments of each machine.
- Run
Headless - Mimics the game day environment (allegedly) - WARNING: WIP MAY NOT WORKRunvagrant upfrom the "Headless" directory if you prefer access only via SSH. Desktop environments will not be accessible by default.In it's current state, may require some tinkering with Virtualbox settings to work
💥 Keep in mind, the whole process of downloading and importing all VMs can take 10 - 30 minutes! 💥
Windows
- Open a PowerShell console as Administrator and navigate to the unpacked code repository you downloaded from GitHub.
- Choose your flavor GUI or Headless and cd into the corresponding directory.
- Run
vagrant up. As long as you have the required dependencies everything should work. - Wait for Vagrant to download and configure each VM.
- DO NOT MESS WITH ANY OF THE VMs THAT POP UP UNTIL YOUR MICROTIK ROUTER IS UP
- It may take some time for the Ubuntu server to get set up completely.
- If Vagrant yells at you about not being able to finish configuration for the Microtik router (vm4), ignore it.
- Your environment is ready! You can shut it all off with
vagrant haltand turn it on again withvagrant up
Linux and MacOS
- Open a Terminal and navigate to the unpacked code repository you downloaded from GitHub.
- Choose your flavor GUI or Headless and cd into the corresponding directory.
- Run
vagrant up. - Wait for Vagrant to download and configure each VM.
- DO NOT MESS WITH ANY OF THE VMs THAT POP UP UNTIL YOUR MICROTIK ROUTER IS UP
- It may take some time for the Ubuntu server to get set up completely.
- If Vagrant yells at you about not being able to finish configuration for the Microtik router (vm4), ignore it.
- Your environment is ready! You can shut it all off with
vagrant haltand turn it on again withvagrant up. You can tinker with the settings of each VM as you deem necessary.
Login Info
Login Info
- The Ubuntu and Kali boxes are configured with the same info as the Minihack
- user: sandbox
- password: password
- The Microtik router will have no existing configurations
- You will need to login with the username "admin" and provide your own password
To Start Fresh
If you screw up the environment and want to wipe it clean...
NOTE: You shouldn't have to re-download your boxes after the first-time setup.
From the directory you ran vagrant up in, run:
vagrant destroy -f← (forces shutdown + deletion automatica lly)- OR
vagrant destroy← (manually confirm deletion of each VM) - This will immediately stop and delete all VMs vagrant has set up using the current vagrantfile
To re-create the environment:
- Just run
vagrant upagain